시소당
레이아웃 인플레이션(LayoutInflater)으로 추가한 화면 삭제하는 방법
안드로이드에서 인플레이션이란 디자인한 XML 레이아웃 파일을 메모리에 올려서 화면에 보여 주는 과정을 말합니다. 인플레이션 방식은 두 가지입니다. 기본적으로 onCreate() 함수에 setContentView() 를 이용해서 화면 전체를 그리는 것과 이미 그려진 곳에 부분적으로 화면을 그리는 방식입니다. 오늘은 인플레이션으로 추가한 View 를 삭제해 보겠습니다.
|
◎ 기존 레이아웃에 LayoutInflater 로 생성한 레이아웃 추가하는 방법 |
먼저 기존 레이아웃에 동적으로 View 를 추가하는 방법입니다. LayoutInflater 객체를 생성하기 위해 getSystemService() 함수를 사용했습니다. 그리고 View 를 추가하기 위해 LayoutInflater 의 inflate() 함수를 호출합니다. inflate() 함수에서 필요한 값들은 다음과 같습니다.
View inflate (int resource, ViewGroup root, boolean attachToRoot)
l resource : 추가하고 싶은 레이아웃 파일 id.
l root : attachToRoot 가 True 일 경우 추가할 View의 부모 뷰
l attachToRoot : true 일 경우 root 에 넘긴 뷰의 자식으로 추가되고 false 일 경우 root 가 생성되는 View 의 LayoutParam 으로만 사용된다
1 2 3 4 5 6 7 8 9 10 11 12 13 14 15 16 17 18 | public class LayoutInflaterActivity extends AppCompatActivity { @Override protected void onCreate(Bundle savedInstanceState) { super.onCreate(savedInstanceState); setContentView(R.layout.activity_layout_inflater); // 위젯을 추가할 메인 레이아웃 객체 가져오기 LinearLayout linearLayout = (LinearLayout) findViewById(R.id.sub); // 레이아웃 인플레이터 객체 LayoutInflater layoutInflater = (LayoutInflater) getSystemService(Context.LAYOUT_INFLATER_SERVICE); // 메인에 새로 생성한 레이아웃 추가 layoutInflater.inflate(R.layout.btn_layout, linearLayout, true); }} |
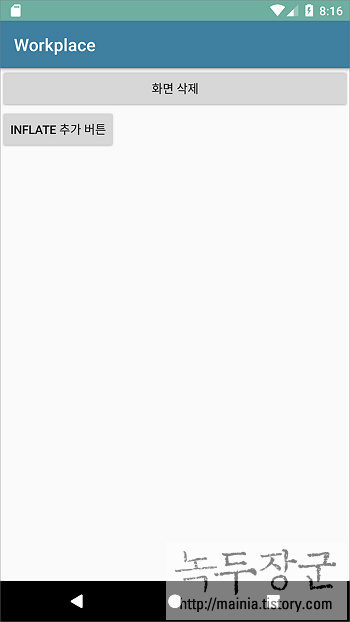
activity_layout_inflater.xml : 메인 Activity 를 구성하는 화면 레이아웃 입니다.
1 2 3 4 5 6 7 8 9 10 11 12 13 14 15 16 17 18 19 20 21 22 23 | <?xml version="1.0" encoding="utf-8"?><LinearLayout xmlns:android="http://schemas.android.com/apk/res/android" xmlns:app="http://schemas.android.com/apk/res-auto" xmlns:tools="http://schemas.android.com/tools" android:layout_width="match_parent" android:layout_height="match_parent" android:orientation="vertical" tools:context="display.samsung.workplace.LayoutInflaterActivity"> <Button android:layout_width="match_parent" android:layout_height="wrap_content" android:id="@+id/btn_delete" android:text="화면 삭제"/> <LinearLayout android:layout_width="match_parent" android:layout_height="match_parent" android:id="@+id/sub" android:orientation="vertical"> </LinearLayout></LinearLayout> |
btn_layout.xml : 기존 화면에 추가할 화면 레이아웃 입니다.
1 2 3 4 5 6 7 8 9 10 11 12 13 | <?xml version="1.0" encoding="utf-8"?><LinearLayout xmlns:android="http://schemas.android.com/apk/res/android" android:layout_width="match_parent" android:layout_height="match_parent" android:orientation="vertical"> <Button android:id="@+id/button" android:layout_width="wrap_content" android:layout_height="wrap_content" android:text="Inflate 추가 버튼" /></LinearLayout> |
|
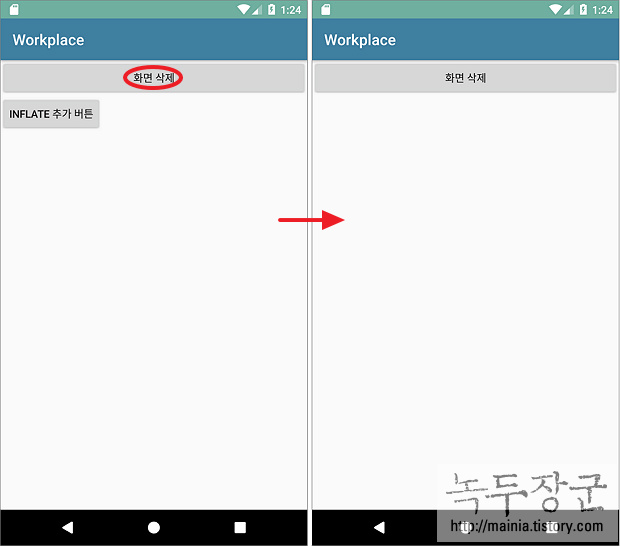
◎ 추가한 레이아웃 삭제하는 방법 |
인플레이션을 이용해서
추가한 레이아웃을 삭제하는 함수는 여러 가지 입니다. 먼저 레이아웃 하위에 있는 모든 View 를 삭제하는 방법입니다. 함수는 removeAllViews() 입니다.
1 2 3 4 5 6 7 8 9 10 11 12 13 14 15 16 17 18 19 20 21 22 23 24 25 26 27 28 29 | public class LayoutInflaterActivity extends AppCompatActivity{ private LinearLayout mLinearLayout; private View mSubView; @Override protected void onCreate(Bundle savedInstanceState) { super.onCreate(savedInstanceState); setContentView(R.layout.activity_layout_inflater); // 위젯을 추가할 메인 레이아웃 객체 가져오기 mLinearLayout = (LinearLayout) findViewById(R.id.sub); // 레이아웃 인플레이터 객체 LayoutInflater layoutInflater = (LayoutInflater) getSystemService(Context.LAYOUT_INFLATER_SERVICE); // 메인에 새로 생성한 레이아웃 추가 mSubView = (View) layoutInflater.inflate(R.layout.btn_layout, mLinearLayout, true); Button btnDelete = (Button) findViewById(R.id.btn_delete); btnDelete.setOnClickListener(new View.OnClickListener() { @Override public void onClick(View v) { mLinearLayout.removeAllViews(); } }); }} |
두 번째 방법인 개별 삭제는 해당 View 의 Parent 객체를 가져와야 합니다. getParent() 함수를 이용해서 삭제할 View 의 부모 객체를 가져온 후 removeView() 함수로 삭제합니다.
1 2 3 4 5 6 7 8 9 10 11 12 13 14 15 16 17 18 19 20 21 22 23 24 25 26 27 28 29 30 31 32 33 | public class LayoutInflaterActivity extends AppCompatActivity{ private LinearLayout mLinearLayout; private View mSubView; @Override protected void onCreate(Bundle savedInstanceState) { super.onCreate(savedInstanceState); setContentView(R.layout.activity_layout_inflater); // 위젯을 추가할 메인 레이아웃 객체 가져오기 mLinearLayout = (LinearLayout) findViewById(R.id.sub); // 레이아웃 인플레이터 객체 LayoutInflater layoutInflater = (LayoutInflater) getSystemService(Context.LAYOUT_INFLATER_SERVICE); // 메인에 새로 생성한 레이아웃 추가 mSubView = (View) layoutInflater.inflate(R.layout.btn_layout, mLinearLayout, true); Button btnDelete = (Button) findViewById(R.id.btn_delete); btnDelete.setOnClickListener(new View.OnClickListener() { @Override public void onClick(View v) { //mLinearLayout.removeAllViews(); ViewGroup parentViewGroup = (ViewGroup) mSubView.getParent(); if (null != parentViewGroup) { parentViewGroup.removeView(mSubView); } } }); }} |
출처: http://mainia.tistory.com/5578?category=251412 [녹두장군 - 상상을 현실로]
SSISO Community