A*(A Star) 알고리즘
Hexagonal grid: Path-finding using A* algorithm
Smooth turning along path
Animation of moving bitmap along path
How to draw an animated timer in Android
AnimationDrawable 이용하여 애니메이션 만들기
안드로이드(Android) 스레드를 이용하여 애니메이션 구현하기
리스트 액티비티(ListActivity) 클릭(Click)처리
ViewPager 애니메이션(Animation)-setPageTransformer()
애니메이션(Animation) - 프레임 애니메이션(Frame Animation) 2
시소당
AnimationDrawable 이용하여 애니메이션 만들기
이전에는 Runnable 스레드를 이용하여 애니메이션을 만들었는데 이번에는 안드로이드에서 지원하는 클래스 AnimationDrawable 을 이용해서 만들어 보도록 합니다. |
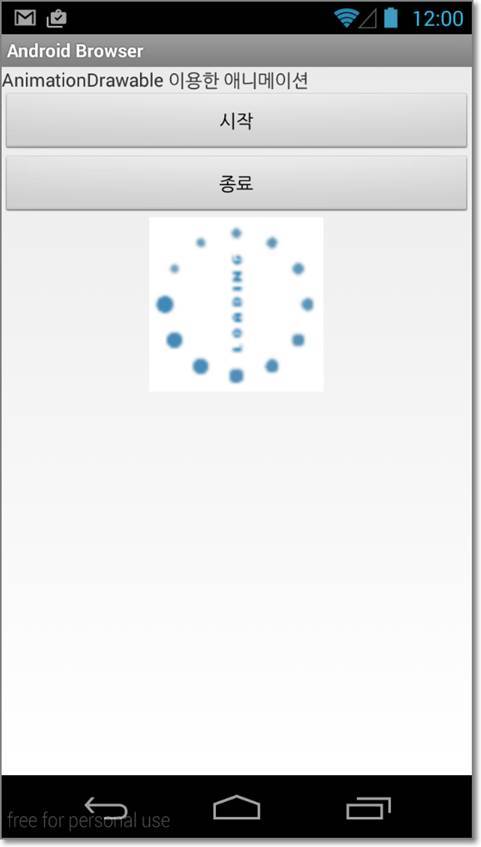
아래 화면에서 시작을 누르게 되면 애니메이션이
시작되게 되고 종료를 누르면 끝납니다. AnimationDrawable
에서 제공하는 함수로 간단하게 기능을 구현한 것이죠.
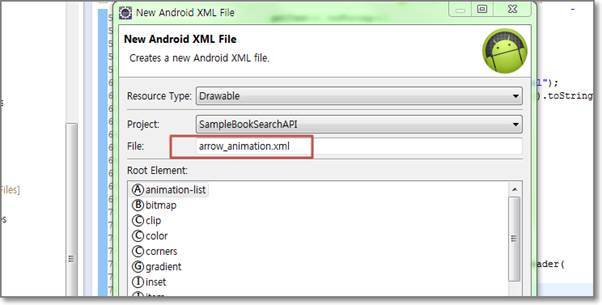
먼저 res/drawable 에 애니메이션 이미지리스트 xml 을
만듭니다. 그리고 item 들을 추가합니다.
Android:duration 의 값은 밀리세컨입니다. 각각의
이미지가 정지해 있는 시간을 설정할수 있는 것입니다.
arrow_animation.xml
1 2 3 4 5 6 7 8 9 10 11 12 13 14 15 16 | <animation-list xmlns:android="http://schemas.android.com/apk/res/android" > <item android:drawable="@drawable/images01" android:duration="100"/> <item android:drawable="@drawable/images02" android:duration="100"/> <item android:drawable="@drawable/images03" android:duration="100"/> <item android:drawable="@drawable/images04" android:duration="100"/></animation-list> |
애니메이션을 돌리기 위한 xml 을 추가하였다면
AnimationDrawable 변수를 만들고 이미지를 표현할
ImageView 의 Drawable 객체를 리턴받아 AnimationDrawable
저장합니다. Drawable 는 View 의 백그라운드에 작업을 할수 있는
객체 입니다.
1 2 3 | ImageView imageView = (ImageView) findViewById(R.id.myImageView);imageView.setBackgroundResource(R.drawable.arrow_animation);aniFrame = (AnimationDrawable) imageView.getBackground(); |
다음은 시작, 종료 버튼의 이벤트를 등록합니다.
시작에는 AnimationDrawable 의 start() 함수를,
종료에는 AnimationDrawable 의 stop() 함수를
넣습니다.
1 2 3 4 5 6 7 8 9 10 11 | Button.OnClickListener startBtnOnClickListener = new Button.OnClickListener() { public void onClick(View v) { aniFrame.start(); }};Button.OnClickListener stopBtnOnClickListener = new Button.OnClickListener() { public void onClick(View v) { aniFrame.stop(); }}; |
메인 activity 의 레이아웃 xml 입니다.
1 2 3 4 5 6 7 8 9 10 11 12 13 14 15 16 17 18 19 20 21 22 23 24 25 26 27 28 29 30 | <?xml version="1.0" encoding="utf-8"?><LinearLayout xmlns:android="http://schemas.android.com/apk/res/android" android:layout_width="fill_parent" android:layout_height="fill_parent" android:orientation="vertical" > <TextView android:layout_width="fill_parent" android:layout_height="wrap_content" android:text="AnimationDrawable 이용한 애니메이션" /> <Button android:id="@+id/myStartButton" android:layout_width="match_parent" android:layout_height="wrap_content" android:text="시작" /> <Button android:id="@+id/myStopButton" android:layout_width="match_parent" android:layout_height="wrap_content" android:text="종료" /> <ImageView android:id="@+id/myImageView" android:layout_width="wrap_content" android:layout_height="wrap_content" android:layout_gravity="center" /></LinearLayout> |
메인 activity 의 전체 소스입니다.
1 2 3 4 5 6 7 8 9 10 11 12 13 14 15 16 17 18 19 20 21 22 23 24 25 26 27 28 29 30 31 32 33 34 35 36 37 38 39 40 | import android.app.Activity;import android.graphics.drawable.AnimationDrawable;import android.os.Bundle;import android.view.View;import android.widget.Button;import android.widget.ImageView;public class SampleActivity14 extends Activity { private AnimationDrawable aniFrame; /** Called when the activity is first created. */ @Override public void onCreate(Bundle savedInstanceState) { super.onCreate(savedInstanceState); setContentView(R.layout.activity_sample_activity14); Button startButton = (Button) findViewById(R.id.myStartButton); startButton.setOnClickListener(startBtnOnClickListener); Button stopButton = (Button) findViewById(R.id.myStopButton); stopButton.setOnClickListener(stopBtnOnClickListener); ImageView imageView = (ImageView) findViewById(R.id.myImageView); imageView.setBackgroundResource(R.drawable.arrow_animation); aniFrame = (AnimationDrawable) imageView.getBackground(); } Button.OnClickListener startBtnOnClickListener = new Button.OnClickListener() { public void onClick(View v) { aniFrame.start(); } }; Button.OnClickListener stopBtnOnClickListener = new Button.OnClickListener() { public void onClick(View v) { aniFrame.stop(); } };} |
출처: http://mainia.tistory.com/1119?category=251412 [녹두장군 - 상상을 현실로]
SSISO Community
A*(A Star) 알고리즘
Hexagonal grid: Path-finding using A* algorithm
Smooth turning along path
Animation of moving bitmap along path
How to draw an animated timer in Android
AnimationDrawable 이용하여 애니메이션 만들기
안드로이드(Android) 스레드를 이용하여 애니메이션 구현하기
리스트 액티비티(ListActivity) 클릭(Click)처리
ViewPager 애니메이션(Animation)-setPageTransformer()
애니메이션(Animation) - 프레임 애니메이션(Frame Animation) 2