시소당
안드로이드(Android) scale 이용해서 애니메이션(Animation) 구현하는 방법
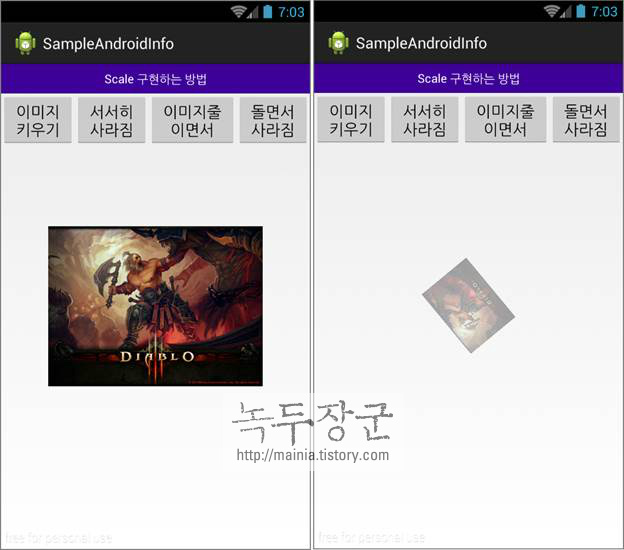
이전 포스팅에서는 안드로이드에서 제공하는 translate 요소를 이용해 애니메이션 효과를 구현해 봤습니다. 이번에는 scale 요소를 사용해서 이미지를 확대/축소 시키거나 서서히 작아지면서 사라지게 하는 액션을 구현해 보겠습니다. 구현한 결과를 동영상으로 찍어서 올렸습니다. 참고하세요.
▼ scale 요소의 속성값들은 고정된 위치의 이미지를 조작합니다. 움직임을 표현하는 translate 와 달리 정해진 위치에서 동작을 표현합니다. 아래 속성값을 보시면 쉽게 이해가 갈겁니다.
◎ fromXScale : 시작하는 X 의 크기
◎ toXScale : 끝나는 시점의 X 크기.
◎ fromYScale : 시작하는 Y 의 크기.
◎ toYScale : 끝나는 시점의 Y 크기
◎ pivotX : X 좌표의 중심점
◎ pivotY : Y 좌표의 중심점
◎ duration : 애니메이션 적용 시간
◎ repeatCount : 반복 횟수
◎ repeatMode : 반복시 다시 생성될 때 방향
▼ XML 에 입력한 속성값은 이미지를 키웠다가 줄이는 동작을 합니다. toXScale = 3 과 toYScale = 3 이므로 가로 세로가 같이 증가했다가 줄어 들게 됩니다.
anim_scale.xml |
1 2 3 4 5 6 7 8 9 10 11 12 13 | <set xmlns:android="http://schemas.android.com/apk/res/android" android:interpolator="@android:anim/linear_interpolator"> <scale android:fromXScale="1.0" android:toXScale="3.0" android:fromYScale="1.0" android:toYScale="3.0" android:pivotX="50%" android:pivotY="50%" android:duration="500" android:repeatCount="1" android:repeatMode="reverse" /> </set> |
▼ 아래 XML 값은 서서히 작아지면서 사라지게 하는 효과를 얻을 수 있습니다. alpha 요소값과 같이 사용해서 이미지가 작아질 때 흐려집니다. 제대로 사라지는 효과를 표현하기 위해서는 투명도를 조절하는 alpha 와 함께 사용해야 합니다.
anim_scale_alpha.xml |
1 2 3 4 5 6 7 8 9 10 11 12 13 14 15 16 17 | <set xmlns:android="http://schemas.android.com/apk/res/android" android:interpolator="@android:anim/decelerate_interpolator" android:zAdjustment="top" > <scale android:duration="@android:integer/config_mediumAnimTime" android:fromXScale="1.0" android:fromYScale="1.0" android:pivotX="50%p" android:pivotY="50%p" android:toXScale=".5" android:toYScale=".5" /> <alpha android:duration="@android:integer/config_mediumAnimTime" android:fromAlpha="1.0" android:toAlpha="0" /></set> |
▼ 아래는 scale 요소를 두 개 사용했습니다. XML 은 순서대로 적용이 됩니다. 첫번째 scale 은 가로 부분을 줄입니다. 그렇게 줄어든 이미지를 다음 scale 요소 값으로 세로로 줄여서 사라지게 합니다.
anim_scale_point.xml |
1 2 3 4 5 6 7 8 9 10 11 12 13 14 15 16 17 18 19 20 21 22 23 24 25 26 27 28 | <set xmlns:android="http://schemas.android.com/apk/res/android" android:fillAfter="false" android:shareInterpolator="false" > <scale android:duration="500" android:fillAfter="true" android:fromXScale="1.0" android:fromYScale="1.0" android:interpolator="@android:anim/accelerate_interpolator" android:pivotX="50%" android:pivotY="50%" android:toXScale="0.05" android:toYScale="1.0" /> <scale android:duration="500" android:fillAfter="true" android:fromXScale="1.0" android:fromYScale="1.0" android:interpolator="@android:anim/accelerate_interpolator" android:pivotX="50%" android:pivotY="50%" android:startOffset="500" android:toXScale="1.0" android:toYScale="0.05" /></set> |
▼ 다음은 rotate 요소와 alpha 요소를 함께 사용해서 이미지를 사라지게 하는 XML 입니다. 이미지를 회전시키면서 작아질 때 흐려집니다. 사라지게 하는 애니메이션을 좀더 그럴싸 하게 만든 XML 입니다.
anim_scale_rotate.xml |
1 2 3 4 5 6 7 8 9 10 11 12 13 14 15 16 17 18 19 20 21 22 23 24 25 26 | <set xmlns:android="http://schemas.android.com/apk/res/android" android:duration="1000" android:fillAfter="false" android:interpolator="@android:anim/accelerate_interpolator" android:shareInterpolator="true" > <alpha android:fromAlpha="1.0" android:toAlpha="0.0" /> <rotate android:fromDegrees="0" android:pivotX="50%" android:pivotY="50%" android:toDegrees="360" /> <scale android:fillAfter="true" android:fromXScale="1.0" android:fromYScale="1.0" android:pivotX="50%" android:pivotY="50%" android:toXScale="0.0" android:toYScale="0.0" /></set> |
▼ 애니메이션 XML 을 소스에서 적용하기 위해서는 로딩을 해야 합니다. XML 값을 로딩하기 위해 AnimationUtils.loadAnimation() 함수를 사용했으며 리턴받은 Animation 객체를 ImageView 의 startAnimation() 인수로 넘깁니다. 그럼 XML 에 설정한 값 대로 애니메이션이 구현됩니다.
1 2 3 | final Animation animTransRight = AnimationUtils .loadAnimation(this, R.anim.anim_scale);mImgView.startAnimation(animTransRight); |
▼ 아래는 애니메이션 효과를 구현하기 위해 scale 요소를 이용한 Activity 전체 소스 입니다. 각각의 기능들을 버튼 이벤트 함수에 구현했습니다.
ImageAnimScaleActivity.java |
1 2 3 4 5 6 7 8 9 10 11 12 13 14 15 16 17 18 19 20 21 22 23 24 25 26 27 28 29 30 31 32 33 34 35 36 37 38 39 40 41 42 43 44 45 46 47 48 49 50 51 52 53 54 55 56 57 58 59 60 | import android.app.Activity;import android.os.Bundle;import android.view.View;import android.view.View.OnClickListener;import android.view.animation.Animation;import android.view.animation.AnimationUtils;import android.widget.Button;import android.widget.ImageView;import com.example.sampleandroidinfo.R;public class ImageAnimScaleActivity extends Activity { ImageView mImgView; @Override protected void onCreate(Bundle savedInstanceState) { super.onCreate(savedInstanceState); setContentView(R.layout.activity_image_anim_scale); mImgView = (ImageView) findViewById(R.id.imgTranslate); final Animation animTransRight = AnimationUtils .loadAnimation(this, R.anim.anim_scale); final Animation animTransLeft = AnimationUtils.loadAnimation( this, R.anim.anim_scale_alpha); final Animation animTransAlpha = AnimationUtils .loadAnimation(this, R.anim.anim_scale_point); final Animation animTransTwits = AnimationUtils .loadAnimation(this, R.anim.anim_scale_rotate); Button btnRight = (Button) findViewById(R.id.btn_right); Button btnLeft = (Button) findViewById(R.id.btn_left); Button btnAlpha = (Button) findViewById(R.id.btn_alpha); Button btnCycle = (Button) findViewById(R.id.btn_twit); btnRight.setOnClickListener(new OnClickListener() { public void onClick(View v) { mImgView.startAnimation(animTransRight); } }); btnLeft.setOnClickListener(new OnClickListener() { public void onClick(View v) { mImgView.startAnimation(animTransLeft); } }); btnAlpha.setOnClickListener(new OnClickListener() { public void onClick(View v) { mImgView.startAnimation(animTransAlpha); } }); btnCycle.setOnClickListener(new OnClickListener() { public void onClick(View v) { mImgView.startAnimation(animTransTwits); } }); }} |
▼ 아래는 메인 Activity 의 화면 레이아웃 XML 입니다. 각각의 기능들을 수행하기 위한 버튼과 ImageView 위젯이 추가 되어 있습니다.
activity_image_anim_scale.xml |
1 2 3 4 5 6 7 8 9 10 11 12 13 14 15 16 17 18 19 20 21 22 23 24 25 26 27 28 29 30 31 32 33 34 35 36 37 38 39 40 41 42 43 44 45 46 47 48 49 50 51 52 53 54 55 56 57 58 59 60 61 62 63 64 65 66 67 68 | <RelativeLayout xmlns:android="http://schemas.android.com/apk/res/android" xmlns:tools="http://schemas.android.com/tools" android:layout_width="match_parent" android:layout_height="match_parent" tools:context="com.example.imageview.ImageTranslateActivity" > <LinearLayout android:id="@+id/linView" android:layout_width="fill_parent" android:layout_height="fill_parent" android:layout_alignParentTop="true" android:orientation="vertical" > <TextView android:layout_width="fill_parent" android:layout_height="wrap_content" android:background="#3F0099" android:gravity="center" android:paddingBottom="@dimen/abc_action_bar_icon_vertical_padding" android:paddingTop="@dimen/abc_action_bar_icon_vertical_padding" android:text="Scale 구현하는 방법" android:textColor="#FFFFFF" /> <LinearLayout android:layout_width="fill_parent" android:layout_height="fill_parent" android:orientation="horizontal" > <Button android:id="@+id/btn_right" android:layout_width="wrap_content" android:layout_height="wrap_content" android:layout_weight="1" android:text="이미지키우기" /> <Button android:id="@+id/btn_left" android:layout_width="wrap_content" android:layout_height="wrap_content" android:layout_weight="1" android:text="서서히사라짐" /> <Button android:id="@+id/btn_alpha" android:layout_width="wrap_content" android:layout_height="wrap_content" android:layout_weight="1" android:text="이미지줄이면서" /> <Button android:id="@+id/btn_twit" android:layout_width="wrap_content" android:layout_height="wrap_content" android:layout_weight="1" android:text="돌면서사라짐" /> </LinearLayout> </LinearLayout> <ImageView android:id="@+id/imgTranslate" android:layout_width="500px" android:layout_height="500px" android:layout_centerInParent="true" android:src="@drawable/diablo" /></RelativeLayout> |

출처: http://mainia.tistory.com/2897 [녹두장군 - 상상을 현실로]
SSISO Community